Nuke User Guide v2.1
By: CS2113T-T13-2 Since: Feb 2020
Go to Webpage
Table of Contents
Introduction ➥
Setting Up ➥
General Usage ➥
• Nuke Structure ➥
• Command Format ➥
• Command Prefixes ➥
Features ➥
1. Add ➥
a. Add a Module into your Module List ➥
b. Add a Category into your Category List ➥
c. Add a Task into your Task List ➥
d. Add a File into your File List ➥
e. Add a Tag to your Task ➥
2. List ➥
a. List your Modules ➥
b. List your Categories ➥
c. List your Tasks ➥
d. List your Tasks Sorted by Deadline or Priority ➥
e. List your Tasks at Specified Time Period ➥
f. List your Files ➥
g. List your Task’s Tags ➥
3. Delete ➥
a. Delete Modules from your Module Lists ➥
b. Delete Categories from your Category Lists ➥
c. Delete Tasks from your Task Lists ➥
d. Delete Files from your File Lists ➥
e. Delete Tags from your Task ➥
4. Edit ➥
a. Edit a Module in your Module List ➥
b. Edit a Category in your Category List ➥
c. Edit a Task in your Task List ➥
d. Edit a File in your File List ➥
e. Mark a Task as Done ➥
5. Change Directory ➥
6. Open File ➥
7. Info ➥
8. Undo ➥
9. Redo ➥
Miscellaneous Information ➥
• Help ➥
• Exiting the Nuke Program ➥
• Loading and Saving ➥
– Loading ➥
– Saving ➥
• Date Time Formats ➥
– Date Formats ➥
– Time Formats ➥
– Time Specifier Formats ➥
Command Summary ➥
FAQ ➥
• Can I not enter the Full Path ➥
• How does the Filtering Process works? ➥
Contact Us ➥
Introduction
You will be interacting with the application via the command line. With the Nuke application, you will be able to perform various operations to manage your modules and tasks such as adding, deleting and listing your modules and tasks. You may also add additional properties to your tasks such as files, deadlines, and priorities.
Nuke facilitates users by automatically sorting user-added tasks and displaying the most important and urgent ones to the users. In the long term, it strives to enhance the quality of NUS students’ lives by serving as the one-stop platform for efficient management of module tasks.
If you are an NUS student and have not tried out Nuke yet...
What are you waiting for? Give Nuke a shot, and you will see how amazing it is!
Setting Up
1.1. Prerequisites
- JDK 11
- IntelliJ IDE
1.2. Setting up the project
-
Fork this repository, and clone the fork to your computer
-
Open the IntelliJ IDE. If you are not in the welcome screen, click
File>Close Projectto close the existing project. -
Set up the correct JDK version for Gradle
-
Click
Configure>Project Defaults>Project Structure -
Click
New...and find the directory of the JDK
-
-
Click on
Import Project -
Locate and select the
build.gradlefile, then clickOK -
Click
Open as Project -
Click
OKto use the default settings provided
1.3. Verifying the Setup
-
In an IntelliJ terminal, run
gradlew build -
Navigate to the folder
build>libsby executingcd build/libs/and then run:java -jar nuke-2.0.jar-
To use Nuke, type a valid command into the terminal and press the enter key to run the command. e.g. Typing
helpand pressing the enter key will show the available commands and their respective command usage help messages. -
Some example commands you can try to get familiar with Nuke:
help: Lists the commands that Nuke supports.addm cs2113t: Adds a module with module code cs2113t, Nuke will recognize it as the module Software Engineering & Object-Oriented Programming and add it to your Module List.
addt assignment2 -m cs2113t -c Assignment -d tmr 23:59 -p 20: Adds a task namedassignment2which belongs to modulecs2113tand categoryAssignmentwith a deadlinetomorrow 23:59and priority of20bye: Exits Nuke.
-
General Usage
This section will explain the fundamental structure of the Nuke application, and important guidelines to follow to ensure smooth usage of the application.
Nuke Structure
Nuke follows the structure of a Directory Tree 🌳 (i.e. folder sub-folder structure). This Directory Tree comprises various levels:
| Directory Level | Description |
|---|---|
| Root | The base of the Directory Tree. Only one root exists in the entire Tree. Added modules are in this level. |
| Module | The second level of the Directory Tree. Added categories are in this level. |
| Category | The third level of the Directory Tree. Added tasks are in this level. |
| Task | The fourth level of the Directory Tree. Added files are in this level. |
| File | The last level of the Directory Tree. Nothing else can be added. |
Below is an illustration of a possible Directory Tree structure:
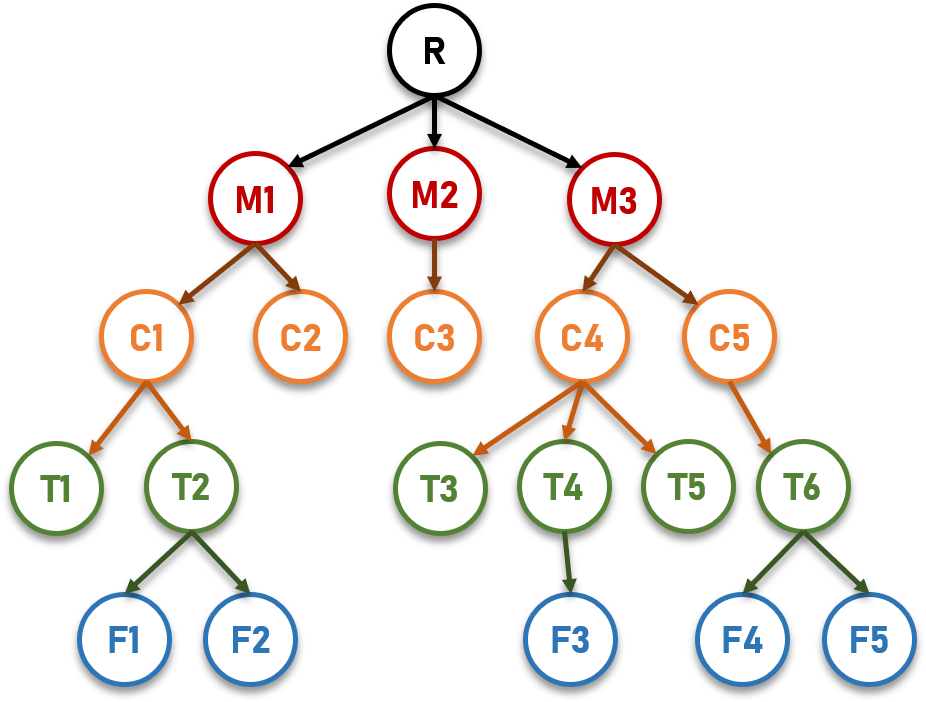
Figure Sample Directory Tree
Root
The Root Directory is the base of the entire Directory Tree. Only one root exists in the entire Tree. Modules are added into this level into a Module List. A module consists of both a module code and a module title.
Only NUS modules are allowed to be added in Nuke.
Module
The Module Directory is the second level of the Directory Tree. Each module has a Category List that has several categories to categorise your tasks, such as Lecture, Tutorial and Assignment, so that you can further organise your tasks. A category consists of a name and a priority to indicate the importance of the tasks in that category.
Upon adding a module, Nuke automatically adds four categories into the module. They are Lecture, Tutorial, Assignment and Lab. So, you don't have to add those categories yourself!
Category
The Category Directory is the third level of the Directory Tree. Each category has a Task List that can contain any number of tasks, which are ideally related to the category. A task has several attributes, namely the description, deadline of the task if any, priority and the done status of the task.
Task
The Task Directory is the fourth level of the Directory Tree. Each task can have files attached to the it. Files are stored in the File List. The file must have a file name and the path to the file.
File
The File Directory is the last level of the Directory Tree. It contains no other directories.
The Nuke application adheres to this Directory Tree structure strictly. It is important to note that you can only add a directory into a directory which is exactly one level lower.
For example, you can only add a task into the Category directory, and not directly into the Module directory.
You can shorten the commands you enter by first entering into a directory. Then you do not need to enter the full directory path in your command!
To learn how to traverse the various directories, see the Change Directory command.
Command Format
In this User Guide, the format for each feature (command) will usually be of this form:
CommandWord <attr0> -pfix1 <attr1> ... [ -pfix2 <attr2> ... ] { -pfix3 <attr3> -pfix4 <attr4> ... }
Command Word
Each command you give to Nuke has to begin with its corresponding unique command word. This helps Nuke to know that you want it to execute a particular command.
Attribute
Attributes are information to be provided in the command. An attribute for the command will be wrapped in angular brackets < > to help you to recognise it.
Prefix
A prefix is used to provide additional supplementary information to the command. More information on the various command prefixes can be found here.
Optional
Some attributes and prefixes are optional and the command can still execute properly even when omitted. However, they may be useful if you want to provide a more specific information to the command. Optional attributes and prefixes will be wrapped in square brackets [ ] to help you to recognise them.
Any
There are times when you may have to include at least one from a set of attributes and prefixes. You may choose to include one or more from the set, but not none of them. Such attributes and prefixes will be wrapped in curly brackets { } to help you to recognise them.
Command Prefixes
On many occasions, you may be required to enter more information to describe the commands you give to Nuke. For example, when adding a task, you may need to specify the module and category to add the task into. You may also want to include additional attributes such as the deadline and priority. All these information can only be recognised by Nuke if they are preceded by the correct prefix.
All command prefixes in Nuke begins with a - and followed by a letter. Below is the exhaustive list of command prefixes and general information that should follow after.
| Command Prefix | General Definition |
|---|---|
-m |
The module code of the module |
-c |
The name of the category |
-t |
The description of the task |
-f |
The name or path of the file |
-d |
The deadline of the task |
-p |
The priority of the category or task |
-e |
To indicate whether filtering is done exactly |
-a |
To indicate whether filtering is done across all directories |
Because each prefix begins with a
-, Nuke has to unfortunately restrict your choice of names for the directories. Specifically, each word in the name of your directory has to begin with a alpha-numeric (i.e. non-symbol) or underscore character.
Features
1. Add
Adds a module, category, task or file into their respective lists.
As mentioned previously, Nuke follows the structure of a Directory Tree (i.e. folder sub-folder structure). Nuke complements the Linux shell command by offering a generic add command word for creating a directory: mkdir
Below sums up what mkdir does at each level of the Directory.
| Current Level | What Happens? |
|---|---|
| Root | mkdir <module code> adds a module into the current directory |
| Module | mkdir <category name> adds a category into the current directory |
| Category | mkdir <task description> adds a task into the current directory |
| Task | mkdir <file name> adds a file into the current directory |
| File | You cannot mkdir here! 😔 |
The above commands have to be done in their corresponding directories. Conversely, the commands below can be done in any directory, but may require you to enter additional information.
In many of the Add commands, you have to enter the directory path of the directory you wish to add the item into. You can shorten the commands you enter by first entering into a directory. Then you do not need to enter the full directory path in your command! 😊
To learn how to traverse the various directories, see the Change Directory command.
For more information on how and if you can not enter the full directory path, see here.
a. Add a Module into your Module List
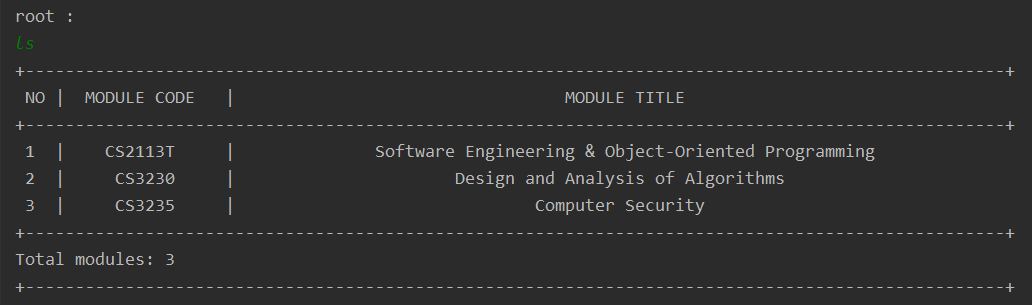
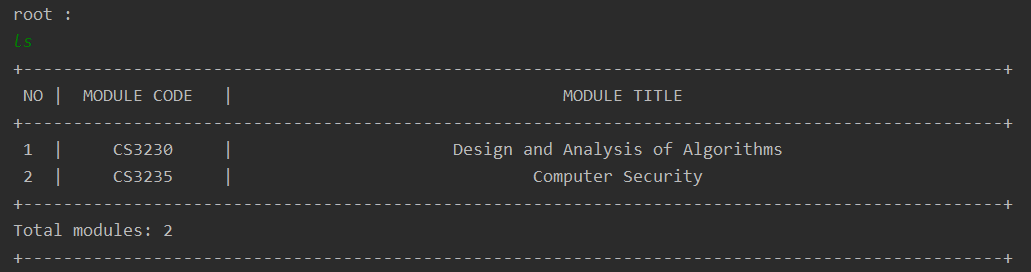
addm adds a module into your Module List. The Module List contains all your added modules and can be viewed via the List Module command.
Format
addm <module code>
module code– The module code of the module
The module code is case-insensitive. However, it must correspond to a valid NUS module. Only NUS modules can be added in this version of Nuke.
Example Usage
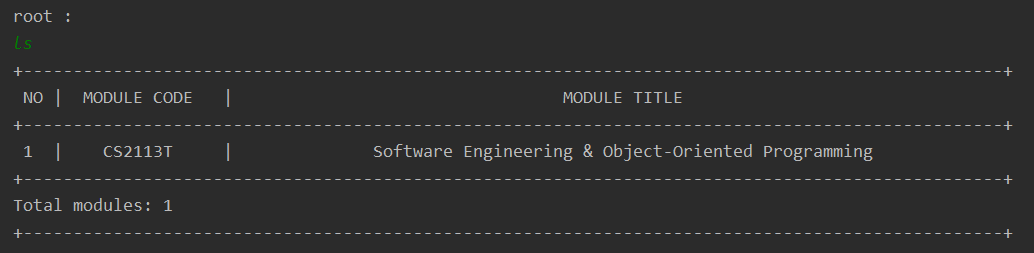
addm cs2113t
Expected Outcome

Before

After
b. Add a Category into your Category List
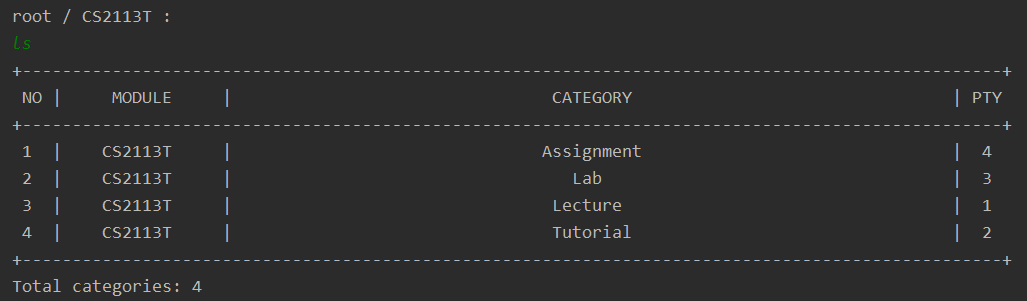
addc adds a category into your Category List. The Category List contains all your added categories in the module and can be viewed via the List Category command.
Format
addc <category name> -m <module code> [ -p <priority> ]
category name– The name of the categorymodule code– The module code of the module to contain the category to be addedpriority– A number indicating the priority of the category (optional)
The
category name cannot exceed 15 characters. 😖 The
priority that you give must be a number between 0 and 20 inclusive. The bigger the number, the more important the category. If the priority is not given, then it will be set to 0.
Example Usage
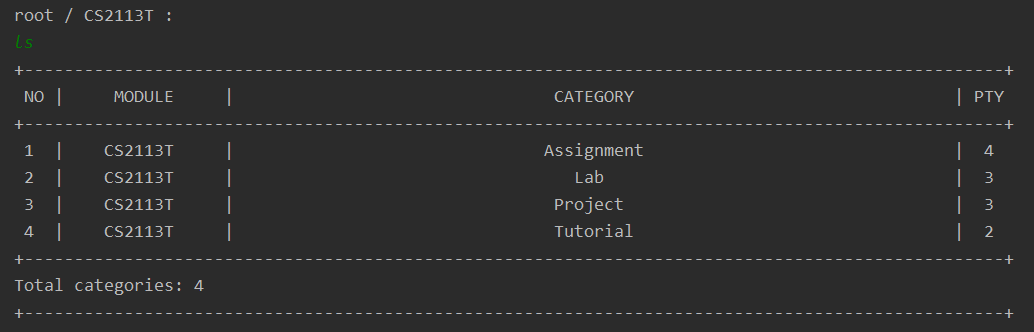
addc Project -m cs2113t -p 3
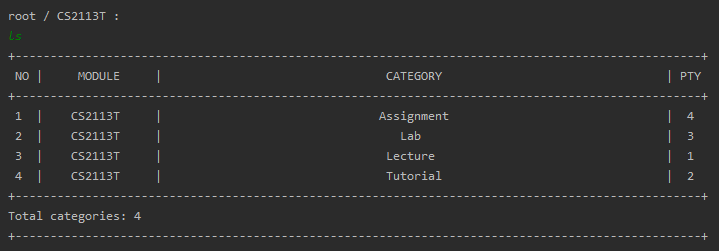
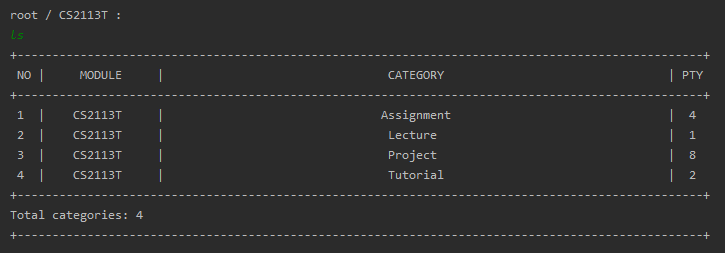
Expected Outcome

Before
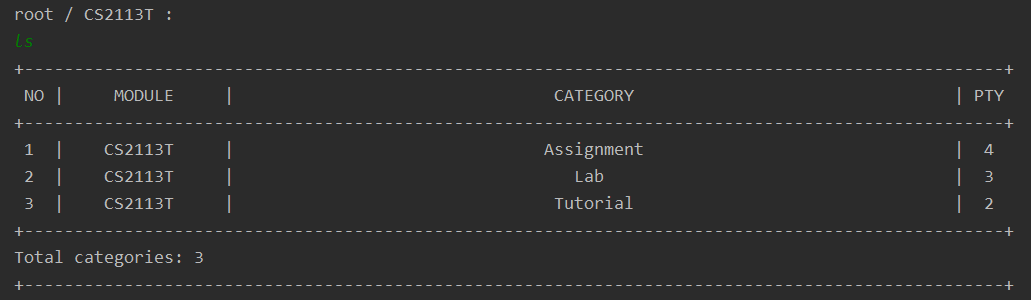
After
c. Add a Task into your Task List
addt adds a task into your Task List. The Task List contains all your added tasks in the category and can be viewed via the List Task command.
Format
addt <task description> -m <module code> -c <category name> [ -d <deadline> -p <priority> ]
task description– The description of the taskmodule code– The module code of the module to contain the category to be addedcategory name– The name of the categorydeadline– The deadline of the taskpriority– A number indicating the priority of the category
The
task description cannot exceed 25 characters. 😖 The
priority that you give must be a number between 0 and 20 inclusive. The bigger the number, the more important the category. If the priority is not given, then it will be set to the same priority as it's category.The
deadline provided consists of a date, followed by a time. If the date is omitted, Nuke will set it to the current date on your device. If time is omitted, Nuke will set it to be 11:59PM. The
deadline provided must adhere to the set of accepted Date Time formats. 😑
Example Usage
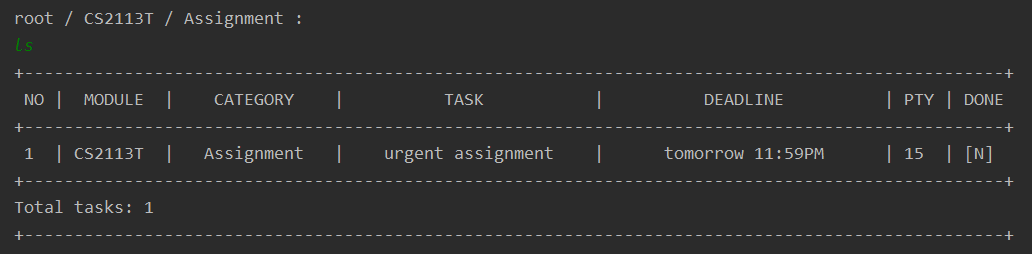
addt urgent assignment -m cs2113t -c Assignment -d tmr 2359 -p 15
Expected Outcome

Before

After
d. Add a File into your File List
addf adds a file into your task’s File List. The File List contains all your added files and can be viewed via the List File command.
Format
addf [ <file name> ] -m <module code> -c <category name> -t <task description> -f <file path>
file name– The name of the file (optional)module code– The module code of the module to contain the category to be addedcategory name– The name of the categorytask decription– The description of the taskfile path– The absolute path of the file
The
file path provided must exist. Otherwise, an error message will be displayed. 😟 Also, the
file name cannot exceed 30 characters. 😶
The
file path should be the absolute path of the file. For Windows, the absolute path will usually start as such: C:\Users\...The
file name provided can be different from the real file name that is stored in the disk. You can choose to leave the
file name blank. In this case, Nuke will set your file name to be the name of your file without the extension at the back. For example, sample_file.pdf will become sample_file.
Example Usage
addf textbook -m CS2113t -c Assignment -t urgent assignment -f C:\Users\\Desktop\CS2113T_Textbook.pdf
addf textbook.pdf -t urgent assignment -f C:\Users\\Desktop\CS2113T_Textbook.pdf
addf textbook.pdf -f C:\Users\\Desktop\CS2113T_Textbook.pdf
Expected Outcome 
Before

After

e. Add a Tag to your Task
Adds a tag to your task’s Tag List. The Tag List contains all your added tags to the task.
Format
addg <tag name> -m <module code> -c <category name> -t <task description>
tag name– The name of the tag to be addedmodule code– The module code of the module to contain the category to be addedcategory name– The name of the category -task decription– The description of the task
Example Usage
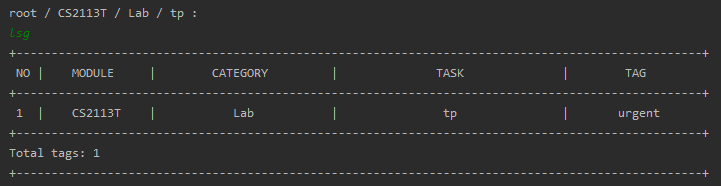
addg urgent -m CS2113t -c Lab -t tp
addg urgent -t tp
addg urgent
Expected Outcome

Before

After
2. List
Lists filtered modules, categories, tasks or files.
Similar to a Linux shell, Nuke has a generic command word for listing child directories: ls
In the table below, you can find what ls does at each level of the Directory.
| Current Level | What Happens? |
|---|---|
| Root | ls shows all your modules in your Module Listls <module code> shows all the categories in the Category List of that module |
| Module | ls shows all your categories in the module’s Category Listls <category name> shows all the tasks in the Task List of that category |
| Category | ls shows all your tasks in the category’s Task Listls <task description> shows all the files in the File List of that task |
| Task | ls shows all your files in the task’s File List |
| File | You cannot ls here! 😦 |
The above commands have to be done in their corresponding directories. On the other hand, the commands below can be done in any directory, but may require you to enter additional information.
Both List commands (with the exception of List your Tasks Sorted by Deadline or Priority and List your Tasks at Specified Time Period) and Delete commands function by first filtering the relevant items from the keywords that you provide. You can further choose to enter
-e to filter using the exact keyword, and -a to filter across all the directories. For more information on how filtering is done, see here.
a. List your Modules
lsm will show your filtered module(s) in your Module List.
Format
lsm [ <module keyword> -e -a ]
module keyword– The keyword to filter the modules’ code by
If the
module keyword is provided, lsm will list out all modules with module code containing the module keyword. Otherwise, it will show all your modules.
Example Usage
lsm
Expected Outcome

b. List your Categories
lsc will show your filtered category(s).
Format
lsc [ <category keyword> -m <module code> -e -a ]
category keyword– The keyword to filter the categories’ name bymodule keyword– The keyword to filter the modules’ code by
Example Usage
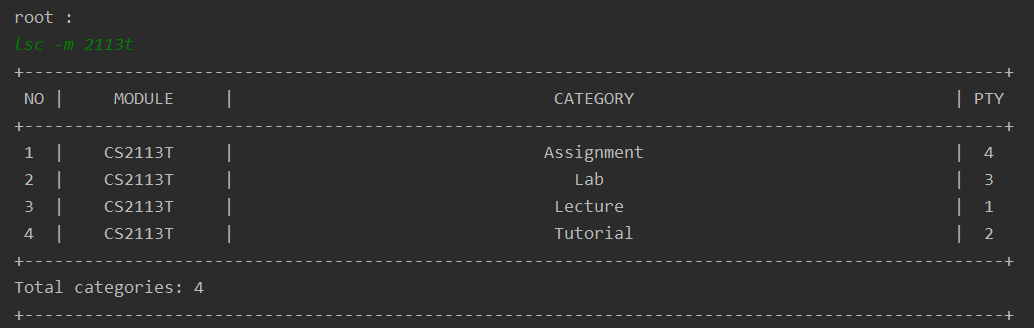
lsc -m cs2113t
lsc
Expected Outcome
c. List your Tasks
lst will show your filtered task(s).
Format
lst [ <task keyword> -m <module keyword> -c <category keyword> -e -a ]
file keyword– The keyword to filter the files’ name bymodule keyword– The keyword to filter the modules’ code bycategory keyword– The keyword to filter the categories’ name bytask keyword– The keyword to filter the tasks’ description by
Example Usage
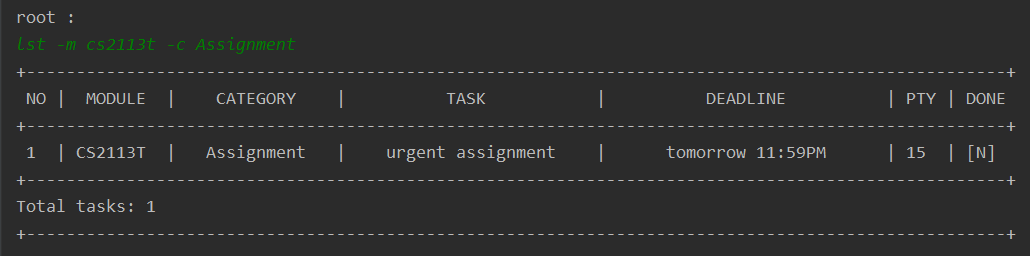
lst -m cs2113t -c Assignment
lst -c Assignment
lst
Expected Outcome
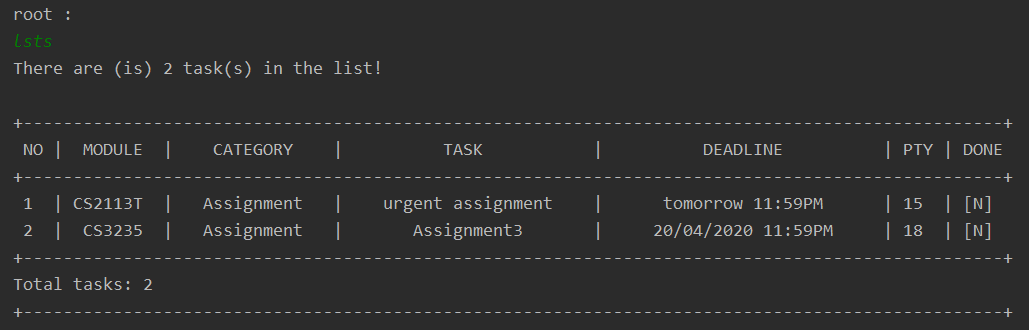
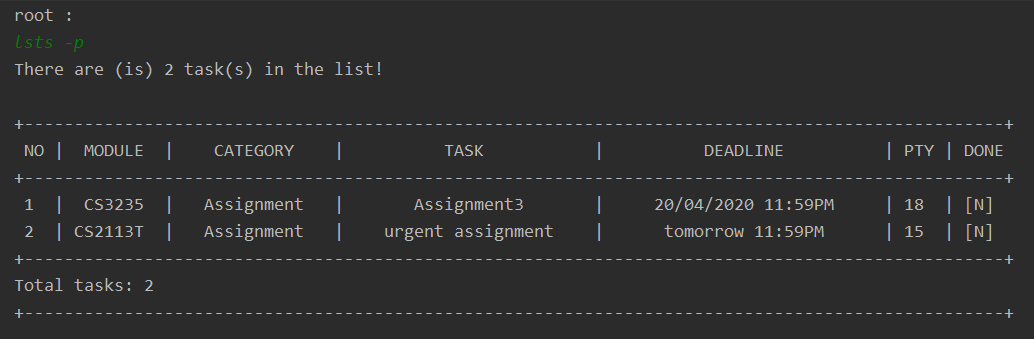
d. List your Tasks Sorted by Deadline or Priority
lsts shows your undone tasks. By default, the tasks will be sorted by deadline, from the earliest to the latest deadline. You may also specify in the command to sort your tasks by priority instead, in descending order of priority, by including the -p prefix.
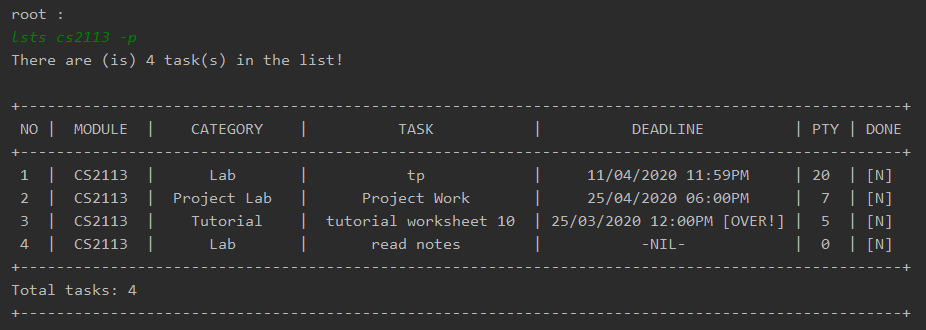
Also, you can further choose to view the sorted tasks of a specific module. By default, this command will show you the sorted list of all your tasks. You can enter the module code to view the sorted list of the tasks in that module instead.
Format
lsts [ <module code> -d -p (choose at most one; default -d) ]
module code – The module code of the module for which its sorted list of tasks is to be shown
Since the command sorts by deadline by default, you need not include the
-d prefix if you want to sort your tasks by deadline 😉. However, you must choose between sorting by deadline or by priority. Entering both
-d and -p will cause an error message to be shown 😨.
Example Usage
lsts
lsts -p
lsts cs2113 -p
Expected Outcome
Sort by Deadline
Sort by Priority
Sort with Specified Module
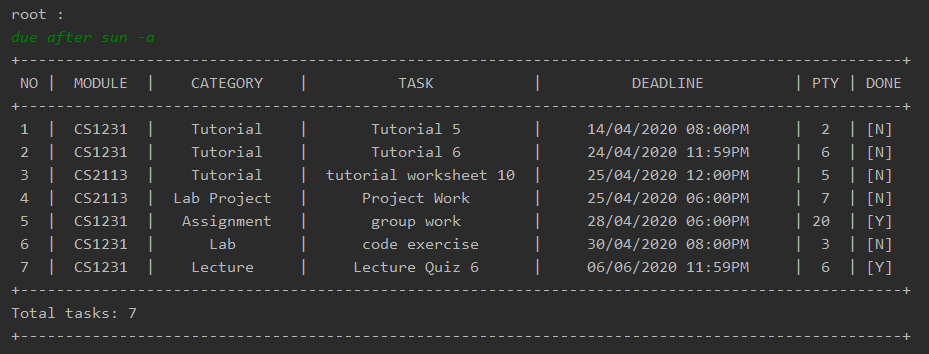
e. List your Tasks at Specified Time Period
due filters through all your tasks according to a specified time period.
A time period is defined by an optional time specifier (e.g. on, before, after) and a date. If the time specifier is left out, the time period is set to be on the date itself.
The filtered tasks are then shown as a list.
By default, only undone tasks will be shown. You can choose to include the done tasks as well by appending
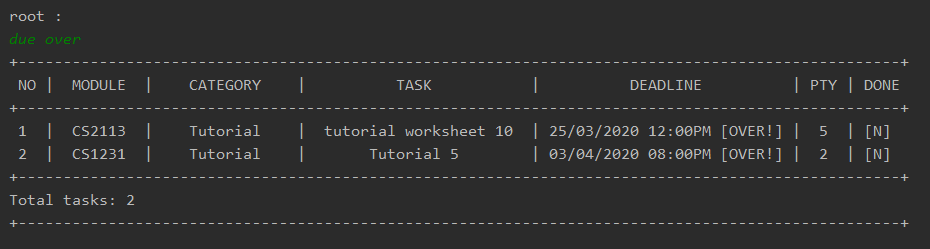
-a at the end of the command. As a bonus, you can also filter for overdue tasks. Simply enter
due over to do so! 😉
Format
due <time specifier> <date> [ -a ]
time specifier– The optional time specifier to define the time period to filter the tasksdate– The date to define the time period to filter the tasks
The
time specifier and date that you provide must adhere to the set of Nuke's accepted Date formats.
Example Usage
due after sun -a
due tdy
due over
Expected Outcome
With Time Specifier
Without Time Specifier

Overdue
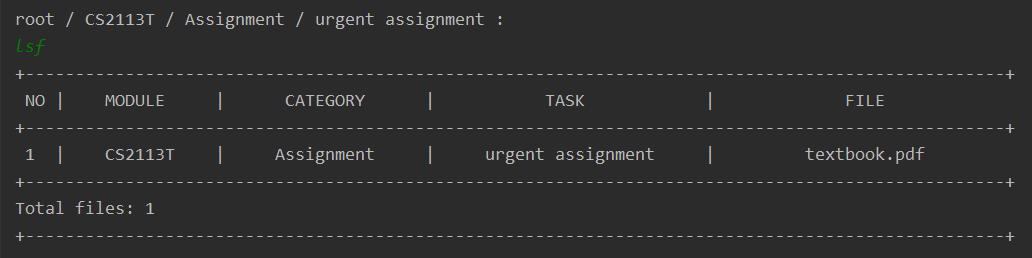
f. List your Files
lsf will show your filtered files(s).
Format
lsf [ <file keyword> -m <module keyword> -c <category keyword> -t <task keyword> -e -a ]
file keyword– The keyword to filter the files’ name bymodule keyword– The keyword to filter the modules’ code bycategory keyword– The keyword to filter the categories’ name bytask keyword– The keyword to filter the tasks’ description by
Example Usage
lsf -m cs2113t -c Assignment -t urgent assignment
lsf -c Assignment
lsf -t urgent assignment
lsf
Expected Outcome
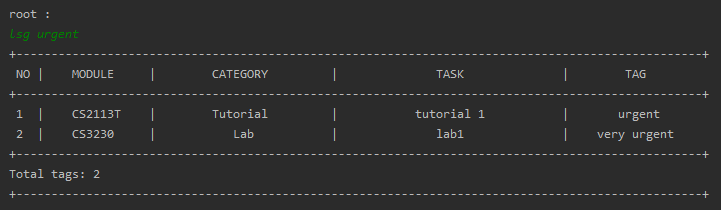
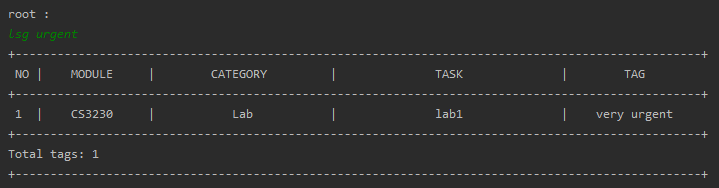
g. List your Task’s Tags
lsg will show your filtered tag(s).
Format
lsg [ <tag keyword> -m <module keyword> -c <category keyword> -t <task keyword> -e -a ]
tag keyword– The keyword to filter the tags’ name bymodule keyword– The keyword to filter the modules’ code bycategory keyword– The keyword to filter the categories’ name bytask keyword– The keyword to filter the tasks’ description by
Example Usage
lsg
lsg urgent
lsg -m CS -c Lab
lsg -m cs2113t -c Assignment -t assignment1
Expected Outcome
3. Delete
Deletes modules, categories, tasks, files or tags from their respective lists.
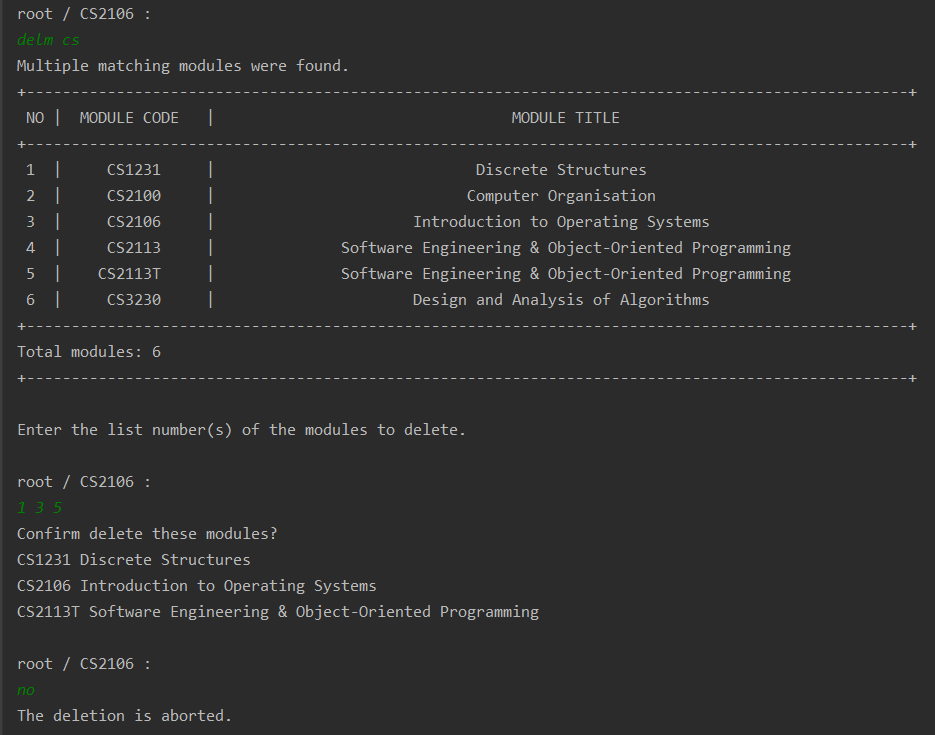
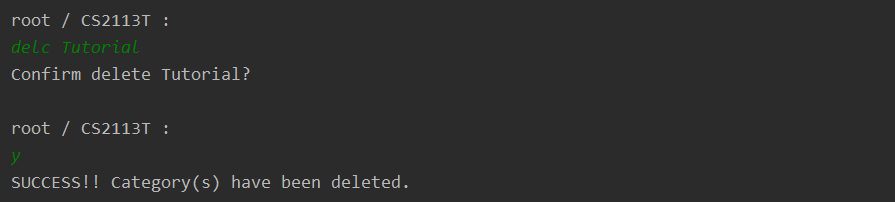
You will be prompted to either enter yes to confirm the deletion or no to abort the deletion after entering the Delete command.
Like the Add Command, Nuke also supports a generic command for deleting a directory: rm
The table below shows you rm does at each level of the Directory.
| Current Level | What Happens? |
|---|---|
| Root | rm <module code> deletes a module from the current directory |
| Module | rm <category name> deletes a category from the current directory |
| Category | rm <task description> deletes a task from the current directory |
| Task | rm <file name> deletes a file from the current directory |
| File | You cannot rm here! 😬 |
The above commands have to be done in their corresponding directories. However, the commands below can be done in any directory, but may require you to enter additional information.
Just like the List commands, the Delete command works by first filtering the relevant items from the keywords that you provide. You can further choose to enter
-e to filter to the exact keyword, and -a to filter across all the directories. For more information on how filtering is done, see here.
If there are multiple matches after filtering, you will receive a further prompt to let you choose which items you want to delete.
Please do not delete the directory you are in, or any of your current directory's parent directories. Doing so will result in an error message to be shown 😟.
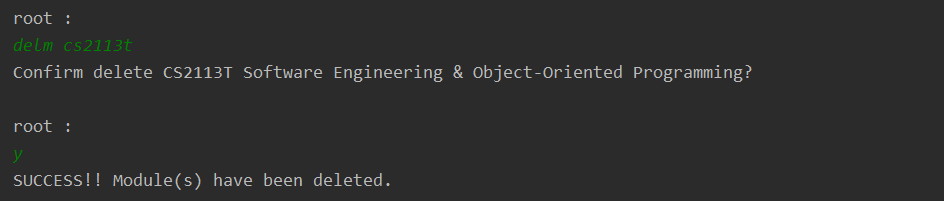
a. Delete Modules from your Module Lists
delm deletes module(s) from your Module Lists. The Module List contains all your added modules and can be viewed via the List Module command.
Format
delm [ <module keyword> -e -a ]
module keyword– The keyword to filter the modules’ code by
Example Usage
delm cs2113t
delm cs
Expected Outcome
Single Deletion
Before
After
Multiple Deletion
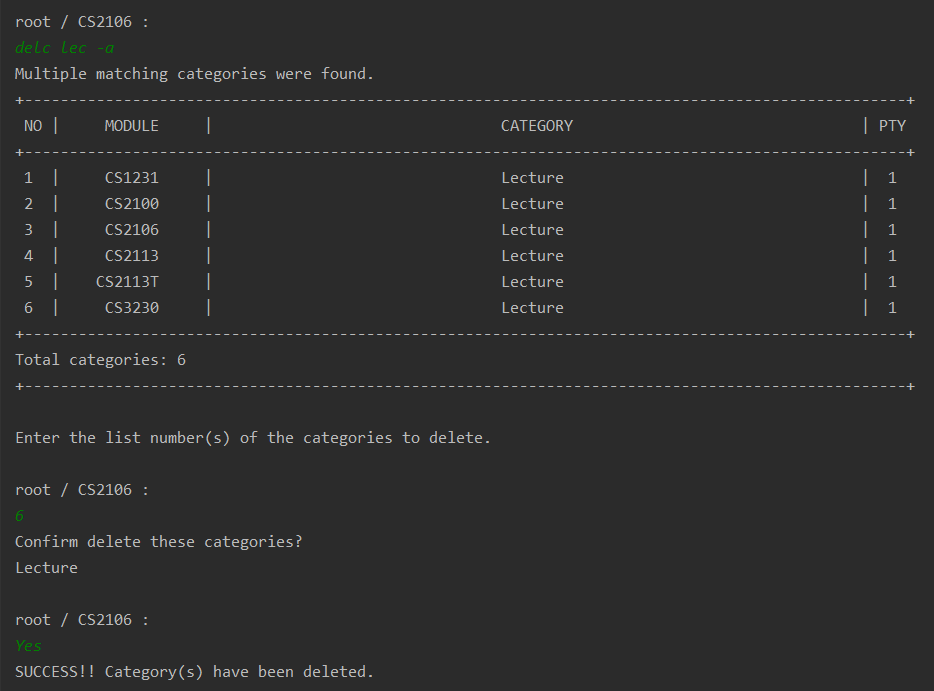
b. Delete Categories from your Category Lists
delc deletes category(s) from your Category Lists. The Category List contains all your added categories of a module and can be viewed via the List Category command.
Format
delc [ <category name> -m <module code> -e -a ]
category keyword– The keyword to filter the categories’ name bymodule keyword– The keyword to filter the modules’ code by
Example Usage
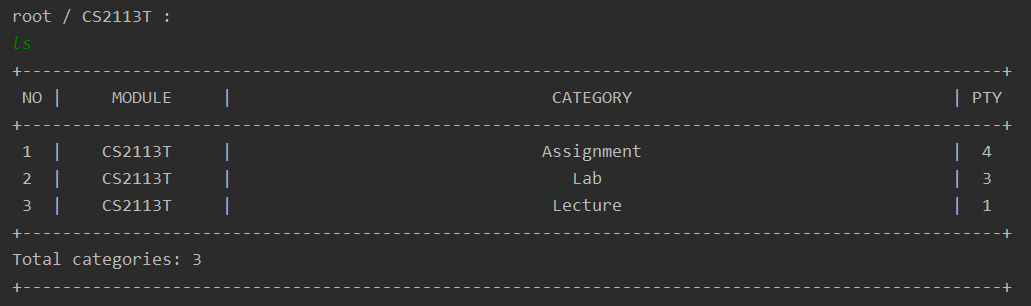
delc Tutorial
delc lec -a
Expected Outcome
Single Deletion
Before
After
Multiple Deletion
c. Delete Tasks from your Task Lists
delt deletes task(s) from your Task Lists. The Task List contains all your added tasks of a category and can be viewed via the List Task command.
Format
delt [ <task keyword> -m <module keyword> -c <category keyword> -e -a ]
task keyword– The keyword to filter the tasks’ description bymodule keyword– The keyword to filter the modules’ code bycategory keyword– The keyword to filter the categories’ name by
Example Usage
delt urgent assignment -m cs2113t -c Assignment
delt assignment -c Assign
delt urgent assignment
Expected Outcome

Before

After

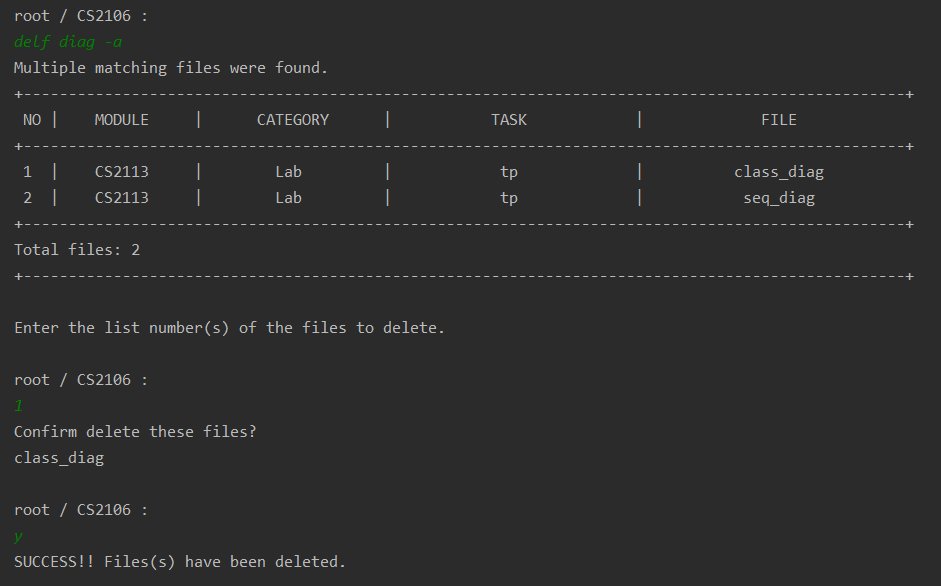
d. Delete Files from your File Lists
delf deletes a file from your task’s File List. The File List contains all your added files and can be viewed via the List File command.
Format
delf [ <file keyword> -m <module keyword> -c <category keyword> -t <task keyword> -e -a ]
file keyword– The keyword to filter the files’ name bymodule keyword– The keyword to filter the modules’ code bycategory keyword– The keyword to filter the categories’ name bytask keyword– The keyword to filter the tasks’ description byExample Usage
delf -m cs2113 -t tpdelf diag -a
Expected Outcome
Have Matches
No Matches

e. Delete Tags from your Task
delg deletes a tag from your task’s Tag List. The Tag List contains all your added tags to the task. (and can be viewed via the List Tag command).
Format
delg [ <tag keywrod> -m <module keyword> -c <category keyword> -t <task keyword> ]
tag keyword– The keyword to filter the tags’ name bymodule keyword– The keyword to filter the modules’ code bycategory keyword– The keyword to filter the categories’ name bytask keyword– The keyword to filter the tasks’ description by
Example Usage
delg ur -m CS21 -c L
delg gen -c Lab
delg urgent
delg
Expected Outcome
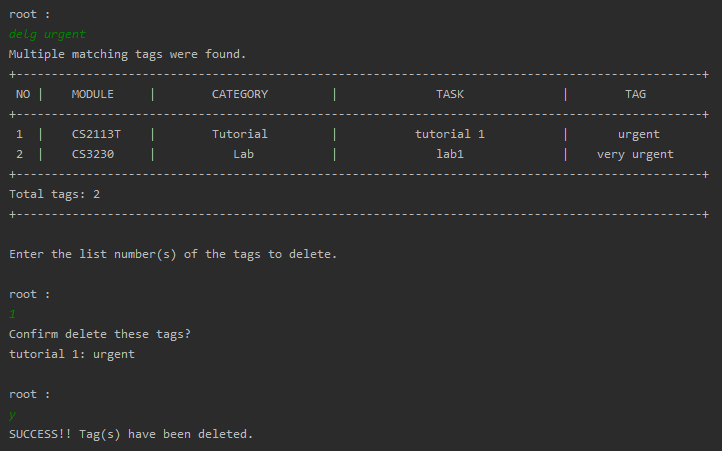
Before

After
 =
=
4. Edit
Edits a module, category, task or file.
In many of the Edit commands, you have to enter the directory path of the directory you wish to edit the item. You can shorten the commands you enter by first entering into a directory. Then you do not need to enter the full directory path in your command! 😙
To learn how to traverse the various directories, see the Change Directory command.
For more information on how and if you can not enter the full directory path, see here.
a. Edit a Module in your Module List
edm edits a module in your Module List. The Module List contains all your added modules and can be viewed via the List Module command.
Format
edm <module code> -m <new module code>
module code– The module code of the module to be editednew module code– The new module code of the module
Similar to the Add Module command, do make sure that the
new module code that you enter is a valid NUS module. Also, ensure that you do not enter the same
new module code as an existing module in the Module List 😮.
Example Usage
edm cs2102 -m cs2101
Expected Outcome
Correct Edit

Before
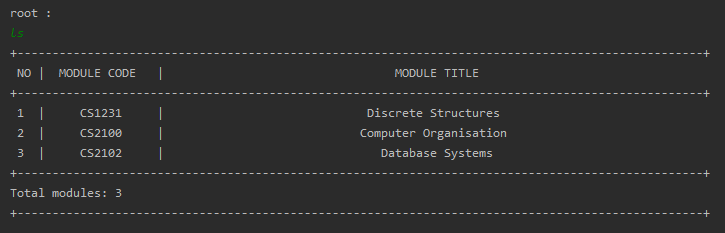
After
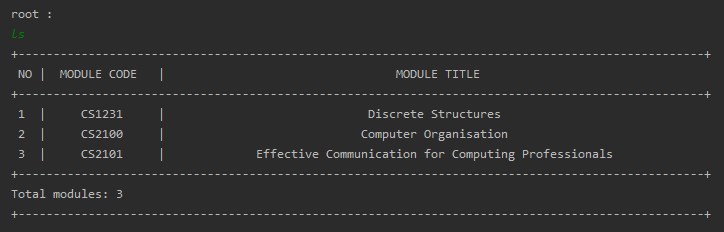
Duplicate Module (Incorrect)

Invalid Module Code (Incorrect)

b. Edit a Category in your Category List
edc edits a category in your Category List. The Category List contains all your added categories of a module and can be viewed via the List Category command.
Format
edc <category name> -m <module code> { -c <new category name> -p <new priority> }
category name– The name of the category to be editedmodule code– The module code of the module containing the category to be editednew category name– The new name of the categorynew priority– The new priority of the category
You need to enter at least one of
new category name and new priority. If both are omitted, an error message would be shown! 😫 Similar to
category name, the new category name cannot exceed 15 characters. In addition, similar to all the
priority attribute in Nuke, the new priority must be between 0 and 20 inclusive.
Example Usage
edc Lab -m cs2113t -c Project -p 8
Expected Outcome
Correct Edit

Before
After
Duplicate Category (Incorrect)

Invalid Priority (Incorrect)

Nothing to Edit (Incorrect)

c. Edit a Task in your Task List
edt edits a task in your Task List. The Task List contains all your added tasks of a category and can be viewed via the List Task command.
Format
edt <task description> -m <module code> -c <category name>
{ -t <new task description> -d <new deadline> -p <new priority> }
task description– The description of the task to be editedmodule code– The module code of the module containing the task to be editedcategory name– The name of the category containing the task to be editednew task description– The new description of the tasknew deadline– The new deadline of the tasknew priority– The new priority of the task
You need to enter at least one of
new task description, new deadline and new priority. If all are omitted, an error message would be shown! 😫 The
new task description cannot exceed 25 characters. As with all
deadline attribute, the new deadline must follow Nuke's accepted Date Time Formats. If the date is omitted, Nuke will set it to the current date on your device. If time is omitted, Nuke will set it to be 11:59PM. In addition, the
new priority should also be between 0 and 20 inclusive.
Example Usage
edt tp -d sat 2359 -p 20
Expected Outcome
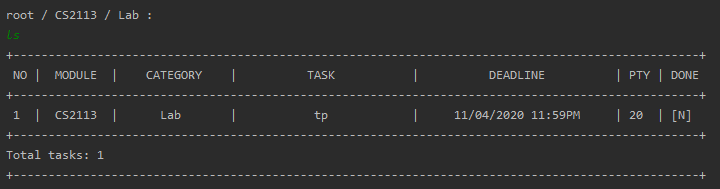
Correct Edit

Before
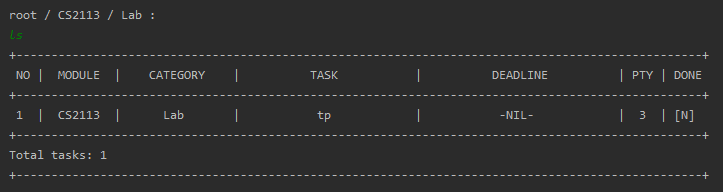
After
Duplicate Category (Incorrect)

Invalid Deadline (Incorrect)

Invalid Priority (Incorrect)

Nothing to Edit (Incorrect)

d. Edit a File in your File List
edf edits a file in your File List. The File List contains all your added files of a task and can be viewed via the List File command.
Format
edt <file name> -m <module code> -c <category name> -t <task description> -f <new file name>
file name– The name of the file to be editedmodule code– The module code of the module containing the file to be editedcategory name– The name of the category containing the file to be editedtask description– The description of the task containing the file to be editednew file name– The new name of the file
Similar to
file name, the new file name cannot exceed 30 characters.
Example Usage
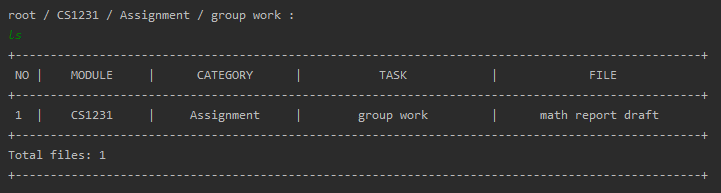
edf math report -f math report draft
Expected Outcome
Correct Edit

Before
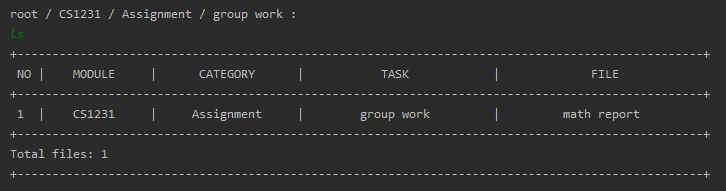
After
Duplicate File (Incorrect)

e. Mark a Task as Done
Marks a previously undone task as done.
If the task was already done, and you execute the command, you will be shown an error message instead!! 😩
Format
done <task description> -m <module code> -c <category name>
task description– The description of the task to be donemodule code– The module code of the module containing the taskcategory name– The name of the category containing the task
Example Usage
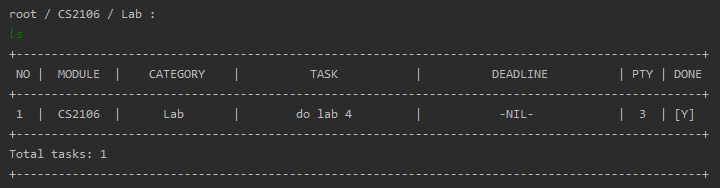
done do lab 4 -m cs2106 -c Lab
Expected Outcome
Done at Root Level

Before
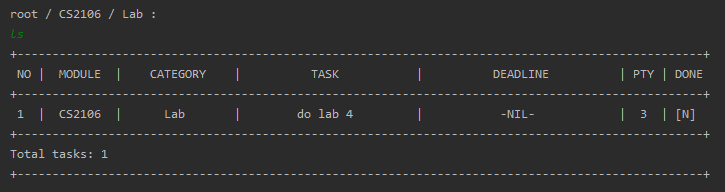
After
Done at Task Level

Done an Already Done Task

5. Change Directory
cd traverses up and down the Directory Tree from your current directory.
Format
cd <directory name> to traverse down
cd .. to traverse up
directory name– The name of the next directory
There will not be any message shown for successful traversal 😐. Instead, you will be able to see a change in the current directory path as shown in the positive traversing example below.
However, attempting to traverse ahead of the Root Directory (first directory) or beyond the File Directory (last directory) will result in an error message being shown 😨.
Example Usage
cd cs2113t
cd
Expected Outcome
Correct Traversal


Incorrect Traversal


6. Open File
open opens your file(s) of a specified task. You can choose between opening a single file or all your files in the File List.
Format
open [ <file name> ] -m <module code> -c <category name> -t <task description>
file name– The name of the file (optional)module code– The module code of the module containing the filecategory name– The name of the category containing the filetask description– The description of the task containing the file
To open a single file, enter its
file name. Otherwise, if you want to open all the files in the list, leave the
file name blank.
Example Usage
open lab_4 -m cs2106 -c Lab -t do lab 4
open lab 4
Expected Outcome
Opening at Root Level

Opening at Task Level

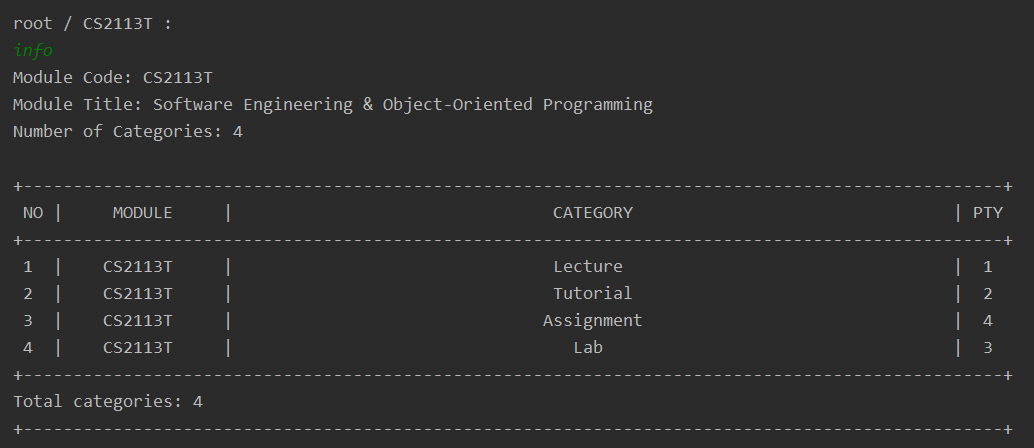
7. Info
info displays information about your current directory. It shows you the current directory’s attributes, and a list of its child directories, if any.
For example, on the Module directory, the Info command will display the module’s code and title, as well as its Category List.
Format
info
Example Usage
info
Expected Outcome
8. Undo
undo undoes a change made to the application.
Change here refers to a successful Add, Delete, Edit or Undo command. These commands changes your lists. The Undo command reverts these changes.
Format
undo
On successful undo, you will be moved back to the Root Directory 😦. This is to allow the application to correctly reload the correct state.
Also, do note that attempting to undo when no changes were made will result in an error message being shown 😨.
Example Usage
undo
Expected Outcome
Correct Undo

Incorrect Undo

9. Redo
redo redoes the change made by an earlier Undo command.
Format
redo
On successful redo, you will be moved back to the Root Directory 😦. This is to allow the application to correctly reload the correct state.
Also, do note that attempting to redo when you are at the newest state (i.e. the most recent change was not due to an Undo command) will result in an error message being shown 😨.
Example Usage
redo
Expected Outcome
Correct Redo

Incorrect Redo

Miscellaneous Information
Help
In the event that you ever forget the usage of a command, you can look it up within the Nuke application itself. All you need to do is to enter the keyword help to show a command summary of all the available commands in Nuke.
Exiting the Nuke Program
Exiting the Nuke program is simple. Simply enter bye to exit.
Upon exiting, the program will save your entire Directory List into a file in your device.
Loading and Saving
The Nuke program loads and saves your entire Directory List automatically, so there is no explicit way to freely load or save your file.
Loading
Loading is done once you start up the Nuke program. The data from the saved directory list file in your device is read to initialise your Directory List from when it was last saved.
Saving
Saving is done upon executing each of your commands in the Nuke program. Your Directory List will be saved into a directory list file in your device.
Date Time Formats
Any date time data that you provide has to adhere to certain formats pre-defined by the Nuke program. Failure to do so will likely result in the program to be unable to recognise your input command, and a warning will be shown 😦.
Instances when you may need to enter a date time will be when adding a deadline to your tasks, or when specifying the date in the Due command.
Here are the following date time formats:
Date Formats
There are two types date formats allowed.
1. Words
You may enter only the following date words.
todayortdy– represents the current datetomorrowortmr– represents the next dateyesterdayoryst– represents the previous datemondayormon– represents the next Monday from the current datetuesdayortue– represents the next Tuesday from the current datewednesdayorwed– represents the next Wednesday from the current datethursdayorthu– represents the next Thursday from the current datefridayorfri– represents the next Friday from the current datesaturdayorsat– represents the next Saturday from the current datesundayorsun– represents the next Sunday from the current date
All dates are taken with reference to the current date on your device.
If you specify the date using the day of the week (i.e.
monday ... sunday), and the current day is the day itself, the date will be referred to the current date. For example, if you enter wednesday and it is Wednesday today, the date will be the current date.
2. Standard Date Format
This refers to the typical dates that are represented with numbers and delimiter symbols.
In this Nuke program, dates should be in the order of day, month, then an optional year. If the year is not provided, the program will automatically assume it to be the current year. Also, the day, month and year should only be entered as numbers and not words (e.g. January is not accepted for the month attribute).
Regarding delimiters, the program will only consider / and - as valid delimiters for dates. Delimiters are optional and may be omitted provided you include the year of the date (e.g. 1/1/20, 1/1 and 010120 are accepted, but not 0101 😯).
An exhaustive list of the standard date formats is given below for your reference.
01/01/2020, 1/01/2020, 01/1/2020, 1/1/2020,
01/01/20, 1/01/20, 01/1/20, 1/1/20,
01/01, 1/01, 01/1, 1/1,
01-01-2020, 1-01-2020, 01-1-2020, 1-1-2020,
01-01-20, 1-01-20, 01-1-20, 1-1-20,
01-01, 1-01, 01-1, 1-1,
01012020, 010120
Time Formats
The Nuke program accepts most time formats that are represented with numbers, delimiter symbols and optional am-pm markers.
The time should be in the order of hour, then minute. The seconds attribute of time should not be given. The minute attribute must be a double digit (i.e. single digits must be padded with a 0 in front). The minute attribute is also optional, and should it be omitted, the Nuke program will automatically set the minute to be 0. Both the 12-h format and the 24-h format are valid time formats for this program.
Regarding delimiters, the program will only consider : and . as valid delimiters for time. Delimiters are optional and may be omitted.
Lastly, the am-pm marker is an optional attribute, and should it be omitted, the Nuke program will automatically assume the time to follow the 24-h format.
An exhaustive list of the time formats is given below for your reference.
6:00pm, 18:00pm, 18:00,
6.00am, 6.00am, 6.00,
1130pm, 2330pm, 2330,
3pm, 15pm, 15
Time Specifier Formats
The time specifier is used in conjunction with a date to define the time period for the Due command. The following words are considered valid time specifiers in the Nuke program.
on– on the specified dateafterora– after the specified datebeforeorb– before the specified date
The time specifier is optional and if omitted, is set to on.
Command Summary
A simple summary of the various commands are shown below:
| Command Word |
What and How? |
|---|---|
mkdir |
Adds a new child directory Format: mkdir <directory name>Example: mkdir cs2113t |
addm |
Adds a new module Format: addm <module code>Example: addm cs2113t |
addc |
Adds a new category Format: addc <category name> -m <module code> [ -p <priority> ]Example: addc Project -m cs2113t -p 3 |
addt |
Adds a new task Format: addt <task description> -m <module code> -c <category name>[ -d <deadline> -p <priority> ]Example: addt urgent assignment -m cs2113t -c Assignment -d tmr 2359 -p 15 |
addf |
Adds a new file Format: addf <file name> -m <module code> -c <category name> -t <task description>-f <file path>Example: addm cs2113t |
addg |
Adds a new tag Format: addg <tag name> -m <module code> -c <category name> -t <task description> Example: addg urgent -m CS2113t -c Lab -t tp |
ls |
Shows the child directories; include child directory name to show it child directories instead Format: ls [ <child directory name> ]Example: ls ls cs2113t |
lsm |
Shows filtered modules Format: lsm [ <module keyword> -e -a ]Example: lsm cs |
lsc |
Shows filtered categories Format: lsc [ <category keyword> -m <module code> -e -a ]Example: lsc tutorial -m cs2113 -e |
lst |
Shows filtered tasks Format: lst [ <task keyword> -m <module keyword> -c <category keyword> -e -a ]Example: lst group -m cs -c assignment |
lsts |
Shows undone tasks sorted by deadline or priority Format: lsts [ <module code> -d -p (choose at most one; default -d) ]Example: lsts lsts cs2113t -p |
due |
Shows tasks at a specified time period Format: due <time specifier> <date> [ -a ] Example: due after sun -a due over |
lsf |
Shows filtered files Format: lsf [ <file keyword> -m <module keyword> -c <category keyword> -t <task keyword> -e -a ] Example: lsf -m cs -t tp -a |
lsg |
Shows filtered tags Format: lsg [ <tag keyword> -m <module keyword> -c <category keyword> -t <task keyword> -e -a ] Example: lsg -m cs2113t -c Assignment -t tp -a |
rm |
Deletes a child directory Format: rm <child directory name>Example: rm cs2102 |
delm |
Deletes filtered modules Format: delm [ <module keyword> -e -a ]Example: lsm cs |
delc |
Deletes filtered categories Format: delc [ <category keyword> -m <module code> -e -a ]Example: delc lec -a |
delt |
Deletes filtered tasks Format: delt [ <task keyword> -m <module keyword> -c <category keyword> -e -a ]Example: delt assignment -c Assign |
delf |
Deletes filtered files Format: delf [ <file keyword> -m <module keyword> -c <category keyword> -t <task keyword> -e -a ] Example: delf -m cs2113 -t tp |
delg |
Deletes filtered tags Format: delg [ <tag keyword> -m <module keyword> -c <category keyword> -t <task keyword> -e -a ] Example: delg -m cs2113 -c Assignment -t tp |
edm |
Edits a module Format: edm <module code> -m <new module code>Example: edm cs2102 -m cs2101 |
edc |
Edits a category Format: edc <category name> -m <module code> { -c <new category name> -p <new priority> }Example: edc Lab -m cs2113t -c Project -p 8 |
edt |
Edits a task Format: edt <task description> -m <module code> -c <category name>{ -t <new task description> -d <new deadline> -p <new priority> }Example: edt tp -d sat 2359 -p 20 |
edf |
Edits a file Format: edt <file name> -m <module code> -c <category name> -t <task description>-f <new file name>Example: edf math report -f math report draft |
done |
Marks a task as done Format: done <task description> -m <module code> -c <category name>Example: done do lab 4 -m cs2106 -c Lab |
cd |
Traverses up and down the Directory Tree Format: cd <next directory name> cd ..Example: cd cs2113t cd .. |
open |
Opens files Format: open [ <file name> ] -m <module code> -c <category name>-t <task description>Example: open lab_4 -m cs2106 -c Lab -t do lab 4 |
info |
Shows information about current directory Format: infoExample: info |
undo |
Undoes a change Format: undoExample: undo |
redo |
Redoes a change made by an earlier undo Format: redoExample: redo |
help |
Shows Command Summary Format: helpExample: help |
bye |
Exits Nuke 😭 Format: bye Example: bye |
FAQ
Can I not enter the Full Path?
You do not have to keep entering the path to the directory at the start of most of the commands in Nuke, in particular the Add and Edit commands.
In other words, you do not have to include the
-m <module code>, -c <category name>, -t <task description> and -f <file name>. Nuke is able to intelligently fill in the missing components in the path for you. Here are various examples on how you can utilise this feature of Nuke to your advantage:
In each of the examples below, we set the context to be at the Category level, and the current path to be
root / CS2113T / Project Commands targeting Current Directory
If you want to add a task into the current category that you are in, that is into the
Project category, instead of entering addt new task -m cs2113t -c Project -p 4, you can simply enter addt new task -p 4. 😊 Commands targeting Parent Directory
If you want to edit a file that has the path
root / CS2113T / Project / tp / image_1, instead of entering edf image_1 -m cs2113t -c Project -t tp -f new file name you can just enter edf image_1 -t tp -f new file name. 😊 Commands targeting Child Directory
If you want to add a category to the
CS2113T module, instead of entering addc new category -m cs2113t -p 3, you can enter addc new category -p 3. 😊 Commands targeting Nearby Directory
If you want to edit a task that has the path
root / CS2113T / Lecture / read lecture notes, instead of entering edt read lecture notes -m cs2113t -c Lecture -p 3 -d sun 3pm you can just enter edt read lecture notes -c Lecture -p 3 -d sun 3pm. 😊 Essentially, Nuke will fill the missing components in the path based on your current directory path. Hence, it would be good to use the Change Directory command to move to the corresponding directory first, so you do not have to enter the full path.
How does the Filtering Process works?
Consider this example:
Let's assume you have three tasks with directory paths
1.
root / CS2113T / Project / do UG,2.
root / CS2113T / Project / peer review and3.
root / CS2113T / group project / do ug faq section.Now, entering the command
lst -m cs -c project -t ug should fetch only the first and third tasks.Furthermore, if an attribute is left empty, such as
lst -m cs -t ug, where the -c <category keyword> attribute is missing, Nuke will simply ignore filtering for all of the categories. In this case, Nuke will select all tasks with module containing cs in their module code and tasks containing ug in their task description. Another feature of the filtering is that it tries to filter from the current directory. For example, if you are in the path
root / CS2113T, then entering lsc will fetch all of the module CS2113T 's categories only, instead of fetching all your categories. Unless you specify the corresponding keyword, or choose to filter all as explained later, Nuke will always behave in such a manner when filtering. In addition, there are two extra conditions you can include to the filtering process. They are:
Filter Exactly
This can be activated by including a
-e at the back of your command. This filters for items that matches exactly the keyword, instead of just containing the keyword. For example, for modules with paths:
root / CS2113 and root / CS2113Twhen the command
delm cs2113 -e is entered, only the first module is shown. The case-insensitive filtering and empty keyword property still holds even when filtering exactly.
Filter All
Similarly, this can be activated by including a
-a at the back of your command. This filters for items in your entire Directory List, and not just limited to the current directory, which is the default setting. You can mix both
-e and -a to filter exactly the way you want. 😉
Contact Us
We are currently still at the development stage of the Nuke application. Any feedback you give can help us to improve Nuke even further! 😄